
Best Practices for Installing Plants


Once it’s time to install your new plants, creating the best possible soil, selecting healthy plants, and timing their installation will set your garden up for success.
First, clear out any weeds, old objects, and unwanted plant material. Rid weeds either by digging out root systems, smothering with layers of thick cardboard, or treating sprouts with an approved organic herbicide. Prune trees to remove any low or hanging limbs.
As you work, protect trees by being careful not to cut roots or damage bark. Keep soils healthy by taking care not to disturb or compact softscape areas.
Properly Prepare your Soils
The better the soil, the better plants will fare! Take a quick soil test, available online or at garden centers, to correctly pick the right amendments and fertilizers you may need to keep plants happy.
After jotting down the results, find a garden center expert who can help you find the ideal nutrient balance before planting.

1. Check with your local jurisdiction about buried utilities on your property before doing any digging.
2. Break up and loosen the top 12” with a spade or rototiller before adding amendments or topsoil
3. Mix topsoil to planting areas (about 8” in garden beds and 4” for lawns).
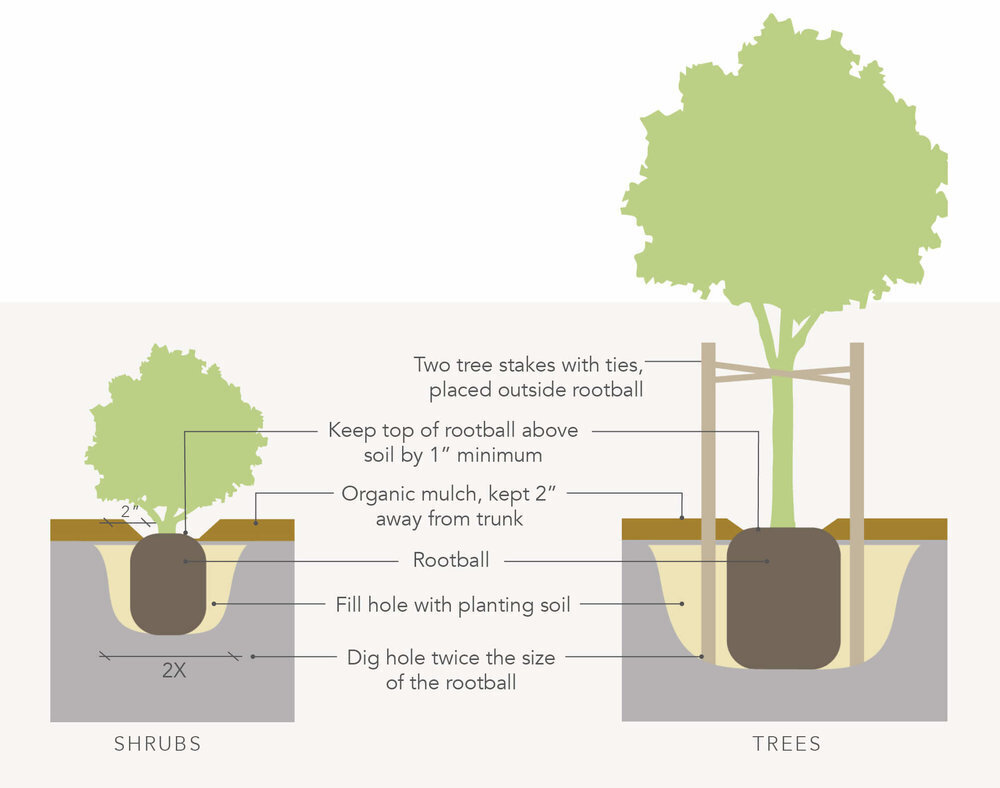
4. After planting, cover surrounding soil with 2” of organic mulch (steering clear of plant stems and trunks).
Plan for Success
It can be hard to imagine plants newly bought from a nursery growing to fill a larger area — up or out. Research the mature size of plants and keep some distance clear for future foliage and root growth.
When planning large expanses of vines, grasses, or groundcovers, you’ll achieve an even look by planting in an even rectangular or triangular spacing. An online calculator, like this one from Midwest Groundcovers can help you do the math on how many you’ll need.

Create Space
Dig a hole with sloping sides twice as wide as the nursery container (its “rootball”). The base of the plant should sit an inch or so above ground level.
Pull the container off of the plant by carefully turning the plant sideways and gently tapping the sides. Gently wiggle the ends of the roots to loosen them up. Once plants are out of their pots, be sure to install them right away. Fill the gap around the rootball with a mix of existing soil and proper soil amendments.
Set up Watering and Irrigation
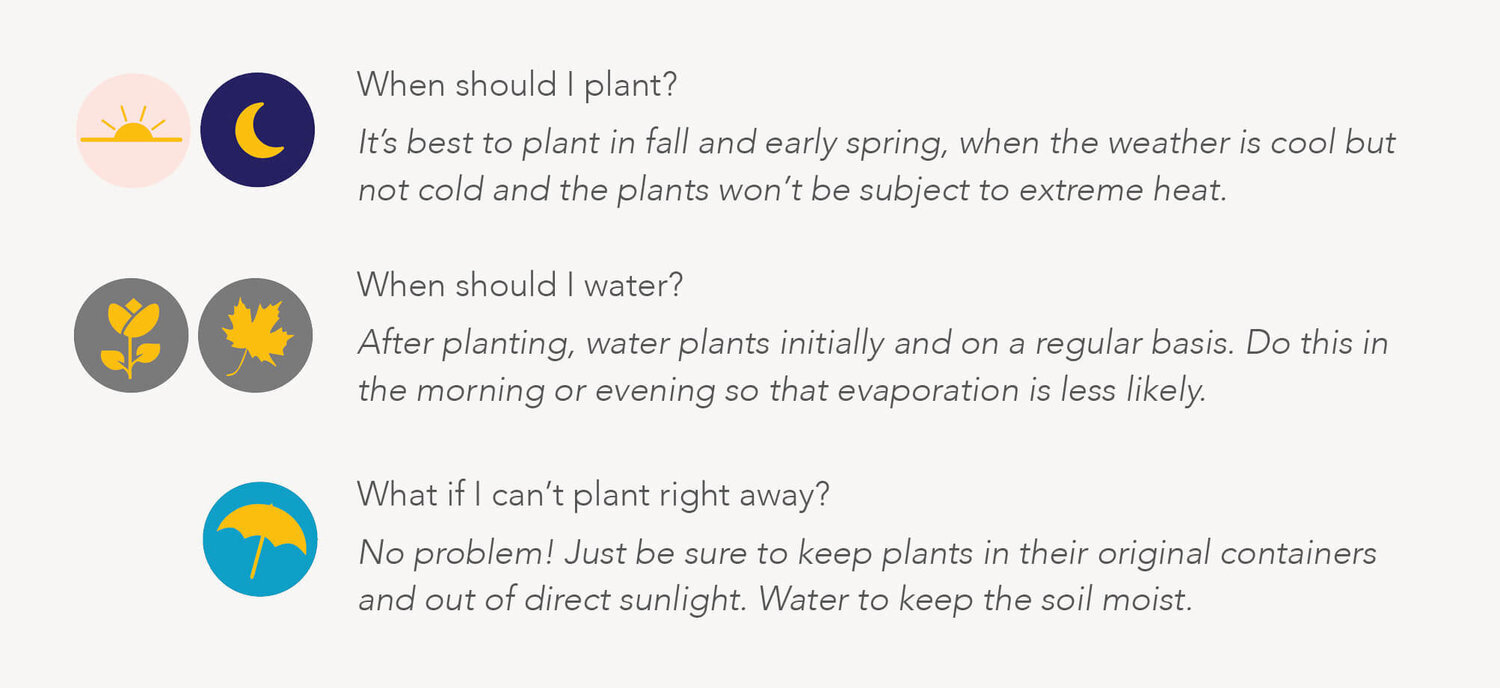
Irrigation is essential in many regions, especially during warm summer months and during the first few years of a plant’s establishment.
Save on utility bills and conserve water with low-emitting drip irrigation systems and smart controllers that respond to local weather conditions. Try grouping plants with similar water needs into the same beds (called “hydrozones”).
Setting up irrigation can be tricky, so be sure to reach out to your local home improvement store or an irrigation specialist if you need a new system installed.
TIME YOUR PLANTING
Be sure to give young plants sufficient water. Even drought-tolerant plants need supplemental irrigation for the first two to three years during establishment.
Take regular walks around your property to check on plant health, drainage and irrigation systems, and safety concerns like dead tree limbs.
We’re here to help. Reach out at hello@yardkit.com to share your yard’s story.